Finding water pooling beneath your wall-mounted unit is an incredibly frustrating start to the day.
Since starting Billy Aircon in 2003 with a small team of five, we have grown to 26 technicians dedicated to keeping Singapore cool.
Drain pan failures are behind nearly 70% of the aircon leaking calls handled by our staff from HDB and condo owners.
I am going to explain exactly why these trays fail and show you the practical steps to stop the dripping for good.
What Is the Aircon Drain Pan?
The drain pan sits directly below the evaporator coil inside your indoor unit. This component, often called the condensate tray, catches the water that condenses on the cold copper coils and channels it safely to the PVC drain pipe.
Every single drop of moisture your aircon extracts from the room passes through this shallow tray. A standard 12,000 BTU bedroom unit in Singapore can produce between 5 and 10 litres of condensate water every single day.
That is a staggering amount of water for a simple plastic channel to manage. When a fault develops here, the water inevitably escapes and runs down your freshly painted walls or ruins your expensive parquet flooring.
Why Drain Pans Leak
1. Clogged Drain Outlet
The primary exit point is a single outlet connecting the tray to the main drain pipe. Blockages happen rapidly when this outlet gets choked with dirt, dust, and biological growth.
We frequently see a thick, clear slime caused by Pseudomonas bacteria clogging the standard 16mm PVC pipes used in most local homes. This biological jelly grows remarkably fast in dark, damp spaces, leaving the daily 10 litres of water with nowhere else to go but over the edge.
2. Cracked or Damaged Pan
Continuous temperature fluctuations cause significant thermal stress on plastic components. The pan repeatedly cools down when the compressor runs and warms back up when the system switches off.
Over years of daily expansion and contraction, the ABS plastic becomes brittle and develops hairline fractures. Older HDB flats with systems installed 8 to 10 years ago are highly susceptible to this specific material degradation. Water simply seeps through these tiny cracks, bypassing the drainage system entirely.
3. Misaligned Pan
Physical shifts easily disrupt the delicate balance required for proper drainage. A clumsy chemical cleaning session or a heavy bump can knock the tray out of its tight seating.
The mounting clips holding the tray are quite fragile. If just one clip comes loose, the water drips past the edge instead of flowing neatly into the central channel.
4. Biofilm and Algae Buildup
A thick layer of green chlorophyta algae can redirect water flow without completely blocking the exit. This growth forms an uneven surface along the bottom of the smooth tray.
Water pools in the low sections created by the biofilm instead of flowing smoothly. This localised pooling eventually causes the tray to overflow at its lowest point.
5. Incorrect Unit Installation
Proper gravity drainage relies entirely on correct positioning during the initial installation. Industry standards require the indoor fancoil to have a slight 1 to 2-degree tilt to the drainage side.
If the mounting bracket is perfectly level or leaning the wrong way, gravity works against you. The moisture gathers at the blind end of the tray and spills out over the front plastic casing.
6. Excess Condensation
Sometimes the tray simply cannot handle the sheer volume of water being produced. Extremely high indoor humidity, low gas levels, or a severely choked filter will cause the evaporator coil to freeze and melt rapidly.
This sudden rush of melting ice overwhelms the standard 16mm outlet pipe. While not a structural fault, this excessive volume exacerbates any existing minor blockages.
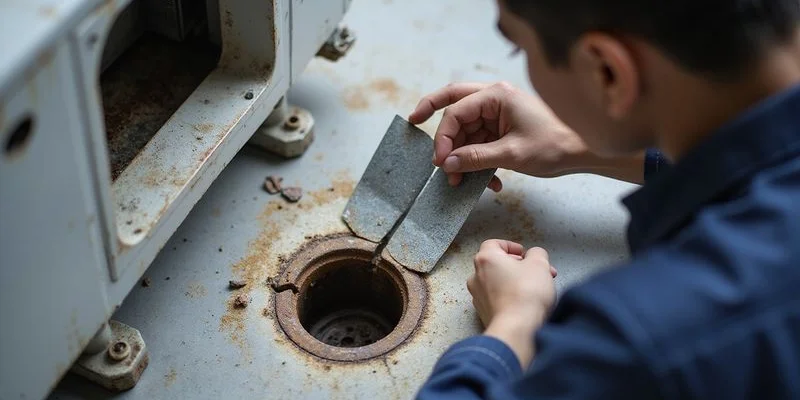
7. Rusted Metal Pan
Some older or light-commercial cassette models feature galvanised steel drain pans instead of plastic. High humidity levels inevitably cause these metal components to corrode.
Rust eats away at the metal, creating pinhole leaks and weak spots across the surface. We see fewer metal trays in modern residential units today, but they are still common in commercial office setups.
How to Identify a Drain Pan Leak
Visual Inspection
Opening the front cover of your indoor unit reveals the edge of the drainage tray. You need to look closely for these specific warning signs:
- A steady flow into the outlet hole (this is normal operation)
- Stagnant, deep pools with no visible movement (indicates a blocked pipe)
- Water gathering at the opposite end of the drain hole (confirms a tilt issue)
- Thick jelly-like substances or green algae patches (requires immediate cleaning)
- Visible fractures across the plastic surface (means replacement is necessary)
The 250ml Water Test
You can easily test the drainage capacity yourself with a simple volume test.
We recommend using a measuring jug for accuracy. Pour exactly 250ml of tap water directly into the exposed tray and watch how the system handles the sudden influx:
- Swift draining indicates the primary pipe is clear
- Water backing up confirms a severe blockage down the line
- Moisture appearing on the wall behind the unit points to a structural crack
Check Below the Unit
Tracing the exact origin of a drip saves hours of guesswork. Place a row of dry paper towels directly on the floor beneath the fancoil.
Run the system on its coldest setting for exactly 30 minutes. The placement of the resulting wet spots will show you if the moisture is escaping from the front lip, the back casing, or the pipe insulation.
How to Fix Drain Pan Leaks
Fix 1: Clear the Drain Outlet
Clearing a simple obstruction is often a straightforward process. You need to manually dislodge the buildup to restore proper flow:
- Switch off the main power supply to the fancoil
- Remove the plastic front panel and the washable mesh filters
- Locate the primary drainage hole on the right or left side
- Insert a flexible pipe cleaner to gently push the slime through
- Flush the newly cleared hole with a small cup of water
Professional equipment is required for hardened blockages deeper in the wall. A proper chemical wash uses pressurised water to thoroughly blast the tray and the entire PVC line.
Fix 2: Clean the Pan Surface
Scrubbing away the biological growth prevents future clogs. You should use a soft-bristled toothbrush to reach the tight corners.
Mix a mild solution of warm water and dish soap to break down the biofilm. Avoid using pure bleach, as strong chemicals will degrade the ABS plastic over time.
Fix 3: Repair Minor Cracks
You can patch tiny hairline fractures if you catch them early enough. A two-part marine-grade epoxy or a specialised ABS sealant (like JB Weld WaterWeld) provides the strongest temporary bond.
This patch job is only a stopgap measure to buy you some time. Constant thermal expansion means most epoxy repairs will fail within three to six months.
You will eventually need to swap out the broken part for a permanent fix.
Our warehouse stocks genuine replacement parts for Daikin, Mitsubishi, and Panasonic units installed locally.
Fix 4: Adjust the Mounting Tilt
Correcting the slope requires shifting the entire indoor unit. The metal mounting plate behind the fancoil controls this critical angle:
- Secure the heavy indoor casing to prevent it from dropping
- Loosen the anchor screws on the galvanised wall bracket
- Create a 1 to 2-degree slope angled at the PVC pipe exit
- Verify the new angle using a standard spirit level
We strongly recommend hiring a qualified technician for this job to prevent accidental damage to your copper gas pipes.
Fix 5: Replace the Damaged Pan
Swapping out a warped or shattered tray is the only reliable solution for severe damage. The technician must partially dismantle the casing to unclip the broken component.
This intricate process ensures the new piece forms a watertight seal against the cold coil.
Our field teams carry exact-fit replacements to ensure the new tray slots perfectly into your specific model.
Preventing Drain Pan Issues
Regular Maintenance
Consistent upkeep prevents slime from forming in the first place. Booking a routine aircon servicing appointment every three months is the industry standard for tropical climates.
During these quarterly visits, a professional technician will:
- Scrub the entire tray surface to remove early biofilm
- Vacuum the primary water line to extract hidden dust
- Inspect the plastic clips for signs of material fatigue
- Confirm the 1-degree drainage slope remains intact
Anti-Algae Treatments
Commercial biocides offer excellent preventative protection between cleaning sessions. Small anti-algae tablets or pan strips sit directly in the water channel.
These strips slowly release quaternary ammonium compounds (QACs) as the moisture flows over them. This constant chemical wash effectively stops Pseudomonas bacteria from colonising the plastic.
Bi-Weekly Filter Washing
A clean mesh filter stops airborne household dust from reaching the wet interior. You should wash these screens under a running tap every 14 days.
Keeping the dirt out of the system drastically reduces the amount of sludge building up near the exit hole.
Cost of Drain Pan Repairs
Understanding the scope of the repair helps you make an informed decision. The table below outlines our standard resolution methods and expected timeframes.
| Service Type | What We Do | Estimated Duration |
|---|---|---|
| Standard clearing | Vacuum the PVC line and wipe down the plastic tray. | 30 to 45 minutes |
| Chemical overhaul | Deep clean the tray, pressure flush the pipe, and wash the coils. | 1.5 to 2 hours |
| Component replacement | Supply a brand-new tray, fit it securely, and test the water flow. | 1 to 1.5 hours |
| Bracket realignment | Correct the wall tilt to ensure a proper 1-degree gravity slope. | 45 to 60 minutes |
Every replacement part fitted by our team includes a comprehensive 90-day warranty.
We will return and resolve the issue for free if the dripping starts again within this period.
Stop the Drip Today
Ignoring a small water drip often leads to massive repair bills later on. The continuous moisture will quickly destroy your plasterboard ceilings and warp your timber skirting boards.
For those living in multi-storey HDB blocks, unchecked leaks frequently seep through the concrete slab and ruin the ceiling of the unit below. You can send a quick WhatsApp message to our dispatch team at +65 9456 0875 for rapid troubleshooting and transparent pricing anywhere in Singapore.